Good evening, friends and neighbors!
After last weeks post about the basic science of bread, I figured it might be a good idea to keep going on this rudimentary road trip through the land of yeasted loaves and carbs. For this post, and most of the posts coming up, I pulled out one of my old culinary school textbooks as a reference, and the memories came flooding back.
Namely, “Holy f*** this stupid thing is heavy.”
 It’s still an excellent resource, though. The book is “Advanced Bread and Pastry: A Professional Approach by Michael Suas, and I highly recommend it to anyone who wants to do a deeper dive on the science and craft of baking bread.
As for today, we’re gonna keep it light and- literally- go by the numbers as we cover The 10 Steps of Baking!
Stand by for tasty science!

from The Emperors New Groove
Trust the Process
The 10 Steps of Baking is, simply put, the procedural steps needed to ensure that any kind of a yeasted bread comes out well. While not too many bakers consciously keep track of these steps (I don’t think they sell any posters that aren’t meant for schools,) it’s because at a certain point this procedure is just… how you make bread happen. You don’t exactly need a step-by-step guide for driving your car, either. Or at least, you don’t after you’ve had a drivers license for a bit.
Regardless of how conscious we are of following these steps, each step must be handled appropriately for the bread being made, or something is going to go wrong- and given the fact that each step builds upon the previous ones, screwing it up early means every step will be screwed up.
So like I say to my trainees at the shop, slow down and take your time. It’s better to go slow and learn it all right than to hurry and get it all wrong as fast as possible.
Let’s begin where all good things begin- something fluffy and weird in a tub in the corner.
Preferment
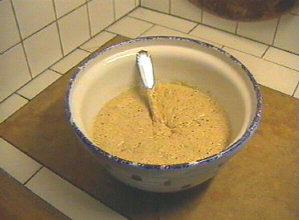
While not all breads require a preferment to turn out well, any bread that you want to have a slightly sour, tangy flavor (like baguette, ciabatta, or sourdough) absolutely need one- ideally one that has been going for a good long while.
A preferment is exactly what it sounds like- a mixture of flour, water, and occasionally a bit of yeast that was mixed up earlier and allowed to pre-ferment.
The ins and outs of fermentation will get covered in a future blog post, but here are the basics- as the flour and water ferment, a small amount of acid is created along with the alcohol and carbon dioxide. This adds nuance to the flavor of the final bread and also encourages better fermentation later on. In the case of sourdough, the preferment also encourages a colony of friendly bacteria, particularly lactobacillus. The taste of these funky little critters gives sourdough its unique tang.
In baking, a preferment (also called a “mother dough,” “starter”, “levain,” or “poolish”) can be maintained indefinitely by “feeding” it- removing some of the starter and replacing it with an equal weight of fresh flour and water that gets mixed in. In this way, preferments have been passed down through families, and the Boudin Bakery in San Francisco has been able to use the same starter dough for the last 150 YEARS.
If that’s the way you want to bake, just remember- FEED THE BEAST.

You might have an issue there… from Little Shop of Horrors
Mixing

from The Powerpuff Girls
Mixing is, well… kinda obvious really. It’s bringing everything together. Of course, there are right ways and wrong ways- it’s not a matter of “dump all the things in a bowl.”
For starters, bread bakers have to be mindful of the temperature of their ingredients. Using ingredients that are too cold will chill and slow down the yeast from doing its job. Too hot, and the bread might proof uncontrollably- or the yeast might actually be killed.
The specifics of that will also include knowing the temperature of the bakeshop, the “friction coefficient” of your mixer (essentially, how hot will your dough get just from the act of being mixed), and even the ambient humidity. Not too mentioned the duration- you don’t want your bread to be tough and chewy from overmixing. All of that is beyond the scope of this post, but at the base level, my advice is putting the water in the bowl first. This prevents bits of dry flour not being incorporated.
Once the dough is mixed up into a single, glorious, uniform mass, it’s time to cover it carefully and let the next step handle itself.
1rst Fermentation
Also called “floor time” or “bulk fermentation”, this is when the yeast gets down to business and starts to party. While the yeast will continue to do its job right up until oven time, fermenting in bulk actually creates the best conditions for proofing. Simply by having a large amount of material and space for a larger amount of yeast to do its work in, fermenting in this way leads to better dough strength and flavor. Bakers call this phenomenon… “mass effect.”

Yes, really.
Once the dough has proofed as much as you need it to, it’s time to cut it down to size.
Dividing
Unless you intend on baking one gargantuan loaf of bread, you’re gonna need to trim that sucker down. It’s not simply a matter of going to town with a bench cutter though.
Now that the dough is proofed, it’s going to be very fragile. You want to handle it carefully and as little as possible to avoid messing with the gluten structure more than necessary. The dough will get portioned by weight, accounting for the loss of moisture in the baking process to get the desired final weight of each loaf. Ideally, you want to try and get these weights right the first time around- cutting little bits off or trying to stick them on won’t always work, and overtaxes your dough. Figure out the weight you want, and try to one-shot it every time.

You probably don’t have one of these in action. Sorry.
Preshaping
Now that you’ve got your dough portioned, it’s time to get it into the basic shape you’ll need. Normally this will be little balls (called “boules”) for things like rolls and loaves, or rectangles for things that’ll need to be rolled out or laminated. This is another opportunity for overhandling, so try not to work your dough too hard. Also, you always want to finish with a nice, smooth surface. Every step influences the final product, and a nice smooth ball will proof like a balloon. A scrappy, rough little ball will not.
Take your time, respect your work, and don’t be a Speedy Shmuck. At the same time… show a little hustle.

Two handing it for the win!
Resting Time
 Second verse, same as the first. No “mass effect” this time, but after all the cutting and shaping, we let the gluten rest and recover itself so we can work with it some more later on.
During any resting time, you want to keep the dough covered well so it doesn’t dry out. At school, a piece of plastic sheeting was sufficient to keep the dough from drying in the open air. If you’re dough dries, it’ll crack and split- making hard bits in your bread and an ugly crust. There aren’t too many ways to repair the damage, so keep it simple- if your hands are off the dough, cover it up!
Shaping
BACK IN ACTION! Time to give your bread loaves their final shape. Here’s where those slabs will become puff dough and those boules oval-shaped batard, or baguette, ficelle, or any of several interesting shapes. Again, don’t overwork your dough, and keep anything your hands aren’t on right then covered.

All bread post will have a Frieza gif in them, somehow.
Final Proofing
Yes… yes… rise, my children… Having been given an idea of what they will finally be, your loaves undergo their final proof. This will happen in a covered or protected space- like under plastic sheeting or in a proofing cabinet, where humidity controls will prevent your little loaves from drying out.
Alternatively, this is also the point where, if you intend to bake them off the next day, you can stick them in a cold space- like the fridge- to slow down their proofing. They will continue to proof, but considerably more slowly, giving you more control of when you want to bake your bread, and how fresh you want it to be.
Baking
The time has come! Using a peel, or carefully laying them in by hand, load your little loaves into the oven. You might use a razor to score your loaves first or mist them with water to encourage a stiff crust. To encourage color, you might even egg-wash them the give them a shiny brown look, such as for brioche or croissants.
Remember to space your bread carefully! Overcrowding your oven means that hot air will have less space to move around your bread, creating an uneven bake.
As the bread bakes, the Maillard reactions start, and the oven spring takes place.
But when the bread is done… it’s not quite done.
Cooling
When your bread is done, place it on racks that allow for good airflow, and leave it alone to cool.
This can seem either like a no-brainer (“Eating something straight from the oven is stupid.”) or a travesty (“But… but… straight from the oven though!”)
The fact is that bread goes through a few more processes as it cools. The crust will solidify and crackle, making the bread “sing.” The gluten structure will slightly retract, firming up as it loses the last bit of moisture it was holding on to.
Finally, once the bread is cool enough to handle… you may enjoy!

Oh boy, I needed more nightmares.
That’s It!
There’s the 10 Steps of Baking, folks! What do you think? Anything you want more details on? Next time I think I’ll discuss yeasts and fermentation, but what do YOU want to hear about?
Drop it in the comments and let me know!
Stay Classy,


Pingback: What Are the 10 Basic Steps in Baking? - flavorfulfeas.com