This entry is aimed at all the Scouters, hikers, fitness nuts, campers, and anyone who enjoys the Great Outdoors.
I spent several years as a Scout, and today I still love camping, hiking, and biking around the wilderness. Combine this with a love of food and baking, and you can see why the idea of campsite cooking appeals to me greatly.
Now most people who aren’t Scouts, don’t know any, or don’t enjoy camping will likely still be living under the misapprehension that eating on a campout involves hotdogs and marshmallows on sticks, cold meat and soup out of cans, and a lethal amount of granola and beef jerky.
Well, yes- there is that. Mostly on hiking trips (when one needs to pack light), dried provisions are a popular way to get the calories, carbs, and protein you need in a light, easy package. Canned goods are heavy and rarely happen, as are any provisions that might require a cooler (such as the hot dogs.)
Marshmallows are fair game though.
Anyway, the point is that when you are enjoying the active lifestyle of the outdoors, it helps to carry the right food with you. For a long hike, you are generally looking for food that:
- Is lightweight, and doesn’t have much water in it. You can add water from your canteen.
- Isn’t easily perishable, or at least has a long shelf-life.
- Creates little waste product so you don’t have to worry about shlepping around a bag of trash.
- Provides the nutrients and energy you need to keep moving.
- Most importantly, is tasty enough that you won’t get sick of it quickly.
You could certainly shell out for beef jerky, trail mix, ramen noodles, and dried fruit, but why not bolster that with these two handy little recipes that you can make at home? Save money, save trash, and save your tastebuds!
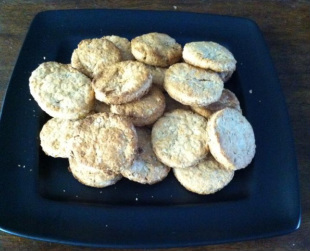
Scottish Bannocks
This recipe is one of my favorites. Very simple, and thus very easy to alter and doctor as you see fit. What follows below is my recipe, modified from an original from GardenGuides.com. The original can be found here.
Ingredients
- Preheat your oven to 450° F.
- Combine all ingredients except milk in a large mixing bowl. Using a pastry blender, two knives (or your fingers), work the butter into the mix until you can’t see any large globs.
- Using a sturdy wooden spoon, mix in the milk.You might need a little more or less than the half cup- you’re looking for a stiff, malleable, but overall smooth consistency that’s not too sticky.
- When the dough gets too difficult to stir, turn it out on to a lightly floured surface and knead the dough- that is, folding the dough over and over on itself in order to mix it. Press the dough into a flat disc, fold it in half, then turn the dough 90 degrees, fold it again. Repeat just until the dough holds together in a uniform mass.
- Reflour your surface, and rub flour on your rolling pin. Roll the dough out to around 1/3″ thick. Use whichever rolling pin you find most comfortable and easiest to use. Remember to rotate the dough after each pass with the rolling pin in order to keep it even and smooth. Reflour the surface and pin if they stick, but be careful not too use too much- it’ll affect the texture and flavor of your bannocks.
- Using a biscuits cutter or cookie cutter, cut out small discs from the rolled-out dough. Geometry will come into play here, as you want to get as many discs as you can fit. Set the discs on an ungreased sheet pan or cookie sheet spaced about an inch apart, then gather up the scrap dough, re-roll it to 1/3″ thick, and repeat.
- Bake in oven for 12 to 15 minutes, or until they are lightly browned. Serve warm that day if you like, or let them cool on a rack, and wrap them up airtight in plastic wrap, tupperware, or little zip bags. They’ll keep a good long while, and are best gently warmed and spread with a little jam, butter, or maple syrup.

Swedish Hard Tack (a.k.a. “Lembas Bread)
Don’t let any Hobbits near them.
Ingredients
2 3/4 cups flour
1/4 cup sugar (switch out with honey/maple syrup/ brown sugar if you like)
1/2 tsp baking soda
pinch of salt
1/2 cup (1 stick) of butter
1 cup buttermilk
Any extra ingredients you like (seeds, spices, herbs, raisins, etc.)
- Preheat oven to 375 ℉
- Sift together the dry ingredients in a large bowl, and then cut in the butter until you can’t see anymore large globs.
- Stir in the buttermilk until it all holds together. Use more or less buttermilk as you feel necessary.
- Roll out on to a floured surface to 1/4″ to 1/8′ inch thick. Cut the dough into 4″ squares and cut each diagonally. Re-roll scraps and repeat. Using a fork, prick each triangle several times.
- Bake the triangles on ungreased cookie sheets or sheet pans until dry and light brown- maybe 10 minutes or so. Let them cool before eating. If packing them for a trip, stack them in small bundles and wrap tightly in tinfoil.
How did these turn out for you? Comments? Questions? Ideas for how to improve them? Share in the comments!
Stay classy, and happy trails!
-BHB
