Good morning, friends and neighbors! Sorry about the non-post last week, but my newly-acquired lack of appendix is healing up well, so last night I actually got to get into my kitchen and make some pie! My friend Becky thoughtfully came by to help take pictures of the prep (no doubt lured by the promise of pie and beer,) so I can finally show you not only the method of preparing pie dough, but how to manage it, use it, and decorate with it.
That said, let us begin!
Pie Dough Prep
In my
previous pie entry, I gave you the recipe for my favorite pie dough. This is a good, all-around pie dough that can be made sweet or savory, and doctored up with a variety of flavors. Seeing as how we are now full-throttle into autumn, I decided to make apple pie.
Of course, this was not too be just ANY apple pie. I wanted this to be CRAZY apple pie- a bite should taste like eating fall itself, and the smell should be like being hit in the face with an apple orchard and a sack of cinnamon.
This was to be Über Apple Pie, and every part of it had to say so.
Therefore, the crust was made with brown sugar rather than white, and a potent melange of cinnamon, cardamom, nutmeg, allspice, and clove.
I started by throwing all the dry ingredients together in a mixing bowl. You’ll notice the weird tool on the bottom right, next to the rolling pin- that is the pastry blender I had mentioned in the previous post. As simple a tool as can be imagined, that turns your fist into four butter knives.
The butter you see on the table is fresh out of the fridge, and is VERY cold- that is to say, perfect for making pie dough.
If you tend to have hot hands, or don’t want to go through the time and trouble of manual labor, this pie dough can very easily be made in a food processor- it’ll just be harder to get the flaky texture you want without some experimenting.

Blender at work!
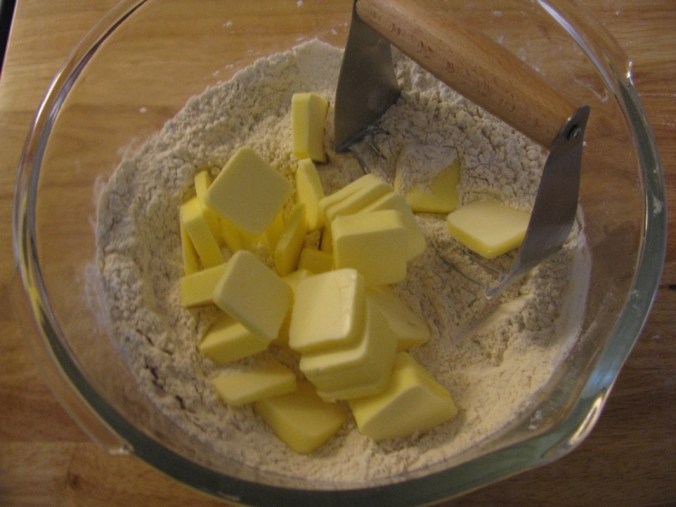
In goes the butter! To save time (and energy!) you should cut the butter up into chunks, rather than just throwing the whole sticks in. Cutting into nice little pats should do well.
Working in the butter by hand DOES take some time, but you’ll see in the difference in the finished crust, I promise you. In general, you want to work the butter in until the mix looks like coarse corn meal, and any visible chunks of butter look like small peas- for a mealier crust (for single crust pies, quiches, tarts, etc), work the butter in until you can’t see any big chunks at all.
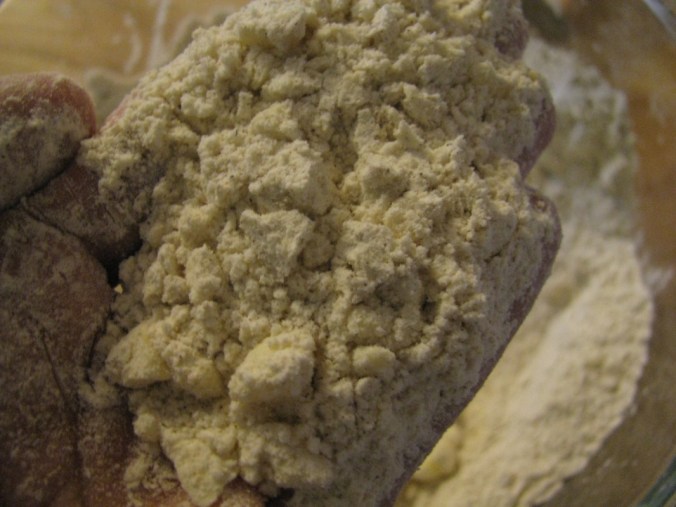
“Coarse corn meal”
|

“Small peas”
|
Next comes the liquid! In the previous entry, I’d mentioned how you can use ice cold water, or almost any kind of chilled liquid in this step. Since I was going for Über Apple, though, there was only one solution…
Ooooh yes… I only needed 2 oz. for the crust. The rest was delicious. One more reason why it’s awesome to be a baker.
Work in the liquid briefly with your pastry blender- then, get your hands dirty.
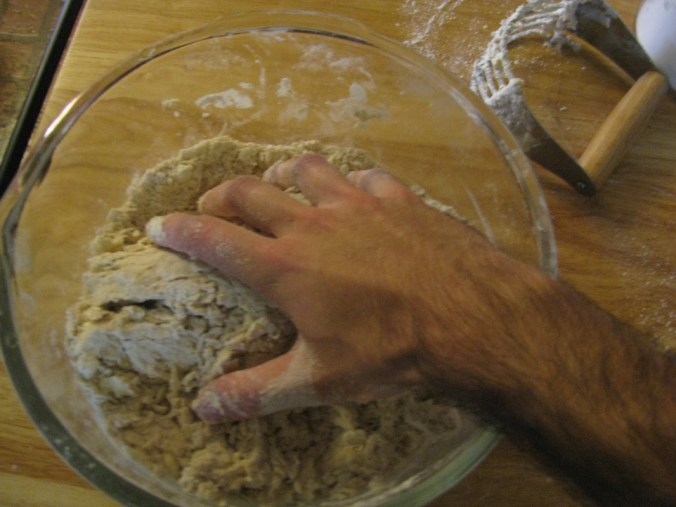
Grargh! Meatpaw want pastry!
Get right in there with your hands and start kneading. You’re trying to get the liquid and flour together so they form a dough, so this will be a combination of working squeezing and mixing. It will be dry and crumbly at first, but just keep working it together. If it’s REALLY not coming together, add a little more liquid (if you haven’t drunken it already…) Keep it going until…
You have two equal sized smooth balls. Pat them into patties, wrap in plastic, and toss them in the fridge for the time being. If you’re not making the pie today, throw them in the freezer- frozen pie dough can keep for a couple months.
Pie Assembly
The time has come! Your crust is made. Your filling is prepared. Time to put it all in a pan and bake it!
First, you will need your pie pan, and your workspace ready!
If your filling wasn’t ready yet, at this moment you might put the lined tin in the fridge for a little bit to relax the dough. I made the filling for this pie ahead of time, so the crust only spent a few minutes in the fridge- just enough to relax it, but not so much it would crack and be difficult to work with later. DON’T trim off the hanging dough! You’ll need it shortly.
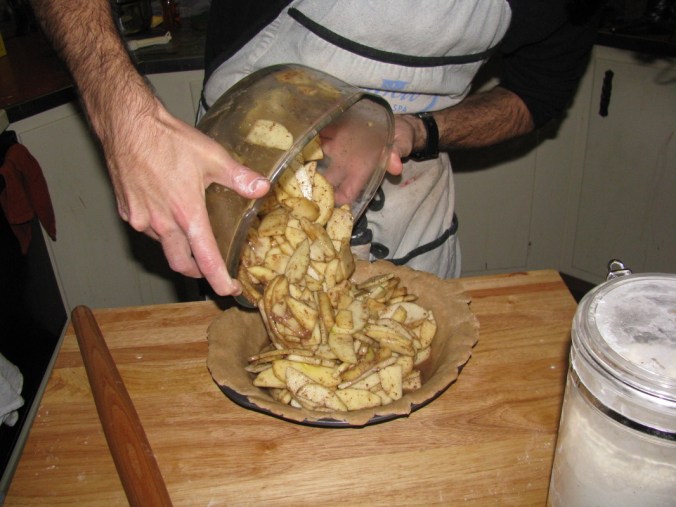
Once the crust is ready… in goes the filling!
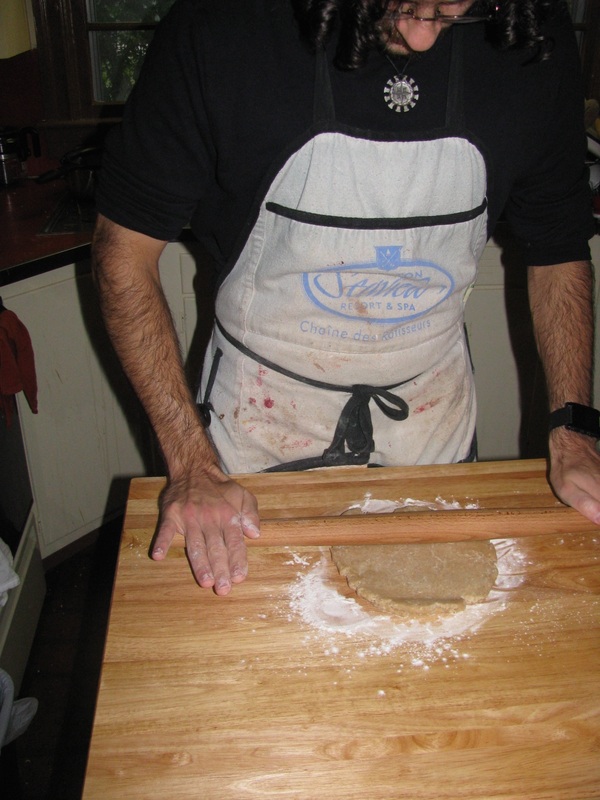
You’ll notice the very small amount of flour on the table to keep the dough from sticking- this is called “bench flour” and you want to use as LITTLE AS POSSIBLE. As you work with the dough, some of this flour WILL get absorbed into it, and you don’t want to dry out your crust. A little on the table, on your rolling pin, and on your hands- NO MORE.
When rolling dough, you want it to keep as smooth and regular a shape as possible. At first, this will be difficult- your dough will be chilled, and it will want to crack rather than stretch or flex. You don’t want to overwork your dough, but just keep pushing together tears as they form.
Another way to keep your dough even (and from sticking to the table) is to rotate it with every pass. When using a rolling pin, you will naturally press harder with your dominant hand- by rotating the dough, you negate this and make a nice, smooth piece of pastry..

So roll…

…and turn…
..and roll again.
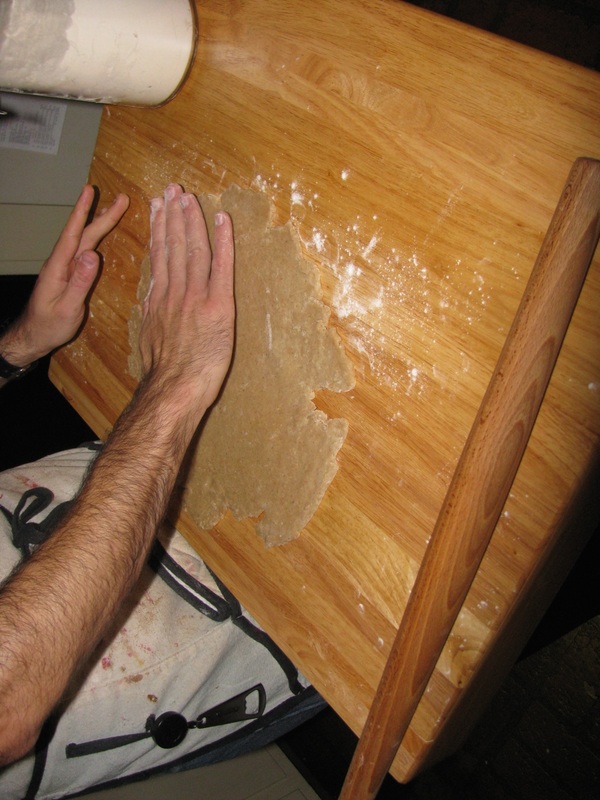
Fix tears…

And roll out as regular a shape as possible.
Next comes the transfer to the pie tin- for most pies, you do not need to grease the pie tin, just make sure it’s clean.

Flip the edge of your dough over your pin…

And roll it right up. This keep the dough from being stretched by gravity too much- just make sure the pin is floured.

Start at the edge of your pie pan…

And unroll.
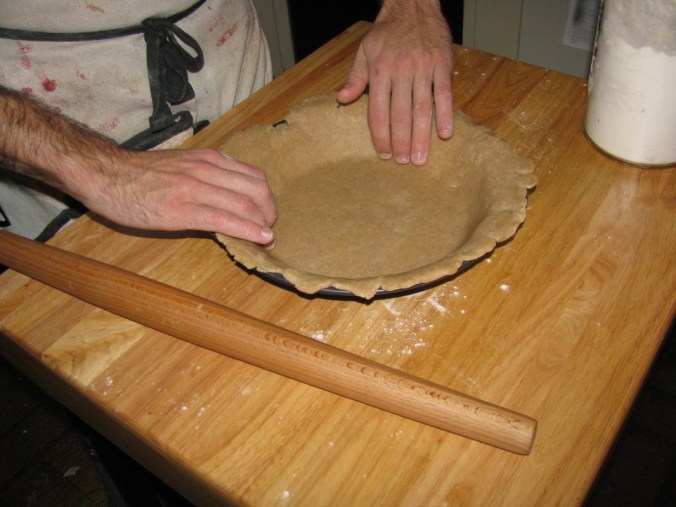
Use your fingers to press and stretch the dough as needed to make sure it drapes over the edges and fills every corner of the pan.
For my Über Apple pie, I used a combination of apples- Winesap (for tartness and body), Honeycrisp (for sweetness), Fuji (for sweetness), and Granny Smith (for additional tartness and body). The spice mixture was the same as the crust, with a little something extra dropped in- a tablespoon or so of apple brandy, and some homemade vanilla extract.
…It’s good to be a baker.
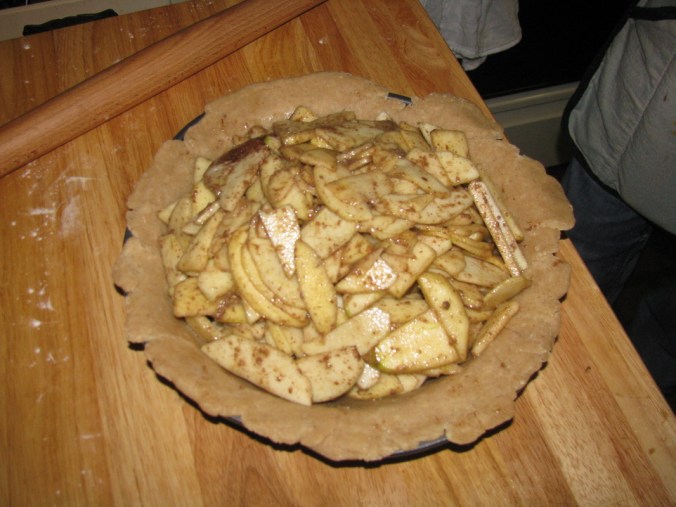
Awww yeah…
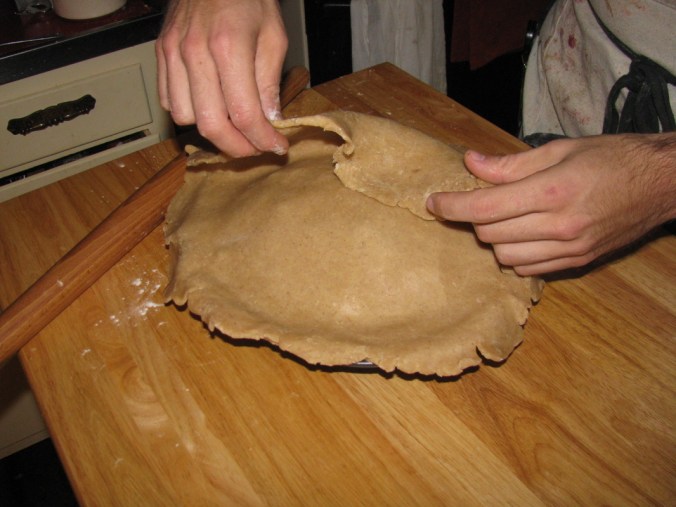
Now, the top crust! Wet the edges of your pie with a pastry brush dipped in water or a wet finger, and the roll out and transfer your top crust exactly as before.
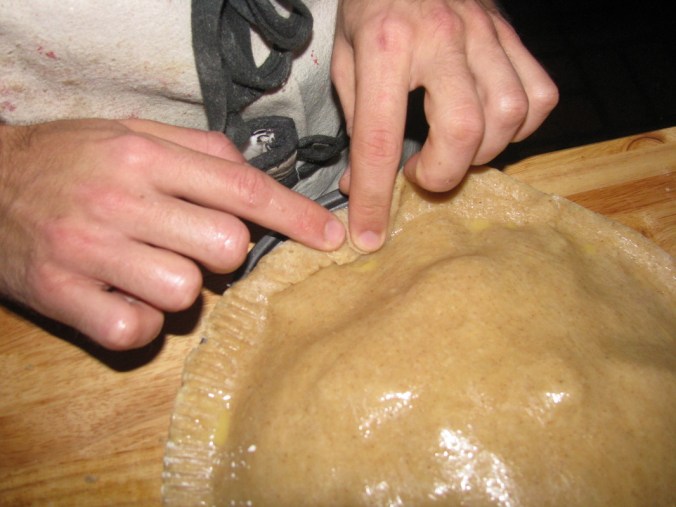
Press your top crust down on the moistened edge of the bottom crust to make a preliminary seal.
Here’s where you can get creative- depending on the pie pan you are using and the edge you want, you may choose to either trim the edges or leave them on and use them in the crimping later on.
If you decide to trim them use a VERY sharp knife or a razor blade to cut the dough- you don’t want to use sawing, cutting motion as much as just push the blade against the dough and have it fall away.

Just push in…

and turn the pie to cut the dough.
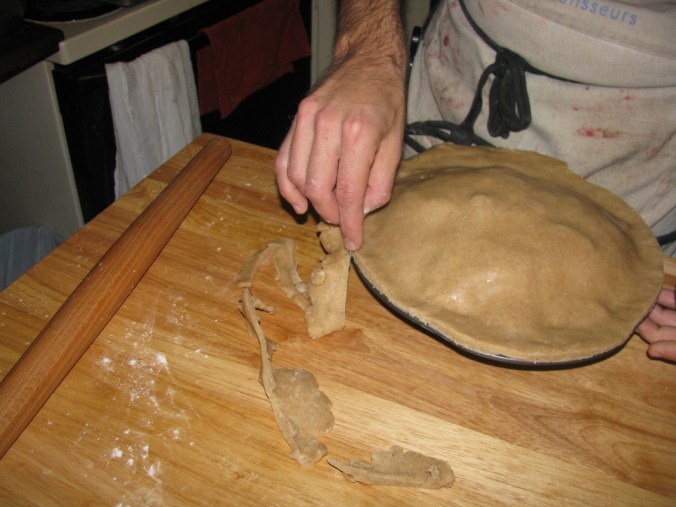
This will keep from pulling and stretching the dough, and creating a ragged edge. If your knife isn’t cutting this easily, get a sharper knife or use a razor blade. I’m using a razor in these pictures.
Don’t throw away the scrap dough! You can use it to make little cookies, smaller pies (if you have enough), or something else that I will show you shortly…
Here is where you can apply a “wash” to your pie- a coating that will make things stick to it and affect it’s appearance. The two most popular washes are an egg wash and a milk wash. The egg wash makes your shiny and golden, while the milk wash will make your pie look duller and more rustic. For this pie, I went with the egg wash- which was just a scrambled egg mixed with a little water. A milk wash is simply a bit of milk in a bowl. Both are applied with a pastry or basting brush, like so…
Now it’s time to crimp your edges! This is how you seal in the filling. There are lots of ways of crimping your pie, all very effective- the choice is all up to the way your want your pie to look. The most popular way is using a fork dipped in flour, and pressing the tines to the crust. My personal favorite is a sort of dog-earred, scallop like crimping. For your education and delight, I did both here.

Flour, press, repeat…

Fold and press…
Continue…

Completed crimping!
Now, remember when I told you to save the scrap dough after trimming? Here’s where that comes back in. Rummaging through my tools, I found tiny Halloween themed pastry cutters! Since Halloween is coming up, I rolled out the scraps, and cut little pumpkins, bats, cats, and ghosts to decorate the pie with!
After egg washing the shapes as well, the only thing left to do was cut vents in the crust. Since you have now sealed up the edges, the steam of cooking filling is going to build up in there. If you don’t want it exploding out the sides, you need to cut vents into the top. This is another chance for creativity- but first, it’s a good idea to put your pie back in the fridge for a good 5 or 10 minutes. This will firm up the wash and relax the dough so that when you cut your vents, they’ll spread cleanly and clear- VERY important if you are going to try and cut a shape! As an alternative, you can use the pastry cutters to cut shapes out of the top crust before you put it on the pie- have fun and experiment!
Normally I vent my pies with my signature top hat, but for this pie, 8 little cuts (once again, with a sharp knife or razor!) did just fine.
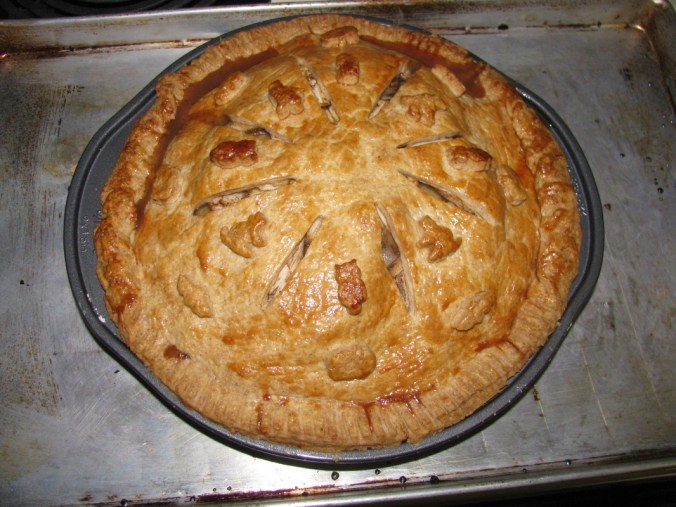
And then, after about 90 minutes in the oven…
The Über Apple pie is completed!
Experiment every way you can to make your own pies exactly how you like them!
Thanks to Becky for the great pics, and as always-
Stay classy,