Good evening, friends and neighbors.
I’ve been described a lot of ways since I was a kid.
- “An old soul in a young body.”
- Erudite
- Driven
- Inventive
- Conscientious
There are probably a few others- especially from folks that don’t like me, but that’s their problem.
These are the ones that seem to drive recent revelations home for me right now.

While perhaps it wasn’t as obvious back when I was heavier, I’ve always been a pretty outgoing and busy person. I always had some new interest to study, a new hobby, a new fascination. if I was interested in something, I’d bite into it down to the bone.
Poetry. Cooking. Baking. Writing. Comparative Theology. Psychology. Model-building. Collections. Storytelling.
I may have been heavier and slower, with maybe a bit less physical energy- but I was always GOING.
Now that I’m physically healthier and have more energy, it’s even more obvious:
- “I’m going to write a blog! I’ll do one entry a week. No, TWO a week! One a day!… Nevermind, one a week is good.”
- “I’m going to write a book! Ooh, I just had an idea for the NEXT book while I’m writing this book! #inspired”
- “I need to get these eight tasks done by the end of the night. But there’s a list of extra stuff if I have the time? Oh, Challenge Accepted, motherf***er… “
- “Hey, I bet I can make a living doing this, WHILE I’m baking full-time! Yeah, I just need to find a…”
Even as I’m writing all that down, and knowing I’m describing myself, it sounds pretty great. That’s the kind of person you THINK about when you imagine successful, driven, hardworking people. That’s the kind of person that winds up on book lists and talk shows, or doing lecture circuits.
From personal experience, it’s also the kind of person who knows how to be a neurotic wreck quietly.

“We have met the enemy, and he is us.”
With my work life starting to stabilize, and my attempts at self-care starting to slowly bear fruit (yeah, next step is decluttering my desk), I’m finally trying to turn my attention toward my “side work.”
Finding a therapist, or really any good professional, isn’t as easy as a Google search. You tend to want someone nearby, with hours you can manage, who’s handled issues like yours before- and is either covered by your insurance or has rates your budget can accommodate. My friend Rachel- herself something of a compulsive researcher/listmaker- helped me out by shooting me a bunch of resources. I’ll include some of them down below.
Before you show up in someone’s office, though, it can be a good idea to do a little homework yourself. It takes some mindfulness and honesty- occasionally painfully.
if you’re going to a therapist though- if you want to get better- then you want to dig up those hard truths.
This doesn’t mean you should diagnose yourself. Between being the son of a doctor and getting a B.A. in Psychology, that was drilled into my head well enough:
“You’re getting a copy of the DSM IV. Read it through if you want, but DO NOT try to diagnose your friends with anything, and DEFINITELY not yourself. By the end of the semester, you will think you have every disorder in the book and be demanding commitment to an asylum.” – one of my professors

I knew I was driven and inventive… but I’d always lose steam when things got too tough or challenging.
I knew how patient I could be with everything and everyone (on a good day, anyway)… but I couldn’t reserve any of that patience for myself or my own failures.
I was energetic… but could never really relax.
I was detail-oriented… but with an all-or-nothing mentality. If it wasn’t perfect, it was garbage.
If I wasn’t perfect, I was lazy.
When I was looking for a job, I had to remind myself that I WASN’T a bum or a slouch… and I needed Emily to remind me of that too.
That’s an anxiety disorder talking.
“Oh, Do Your Research…”
 Based on what I’ve learned, “high-functioning anxiety” is not a clinical term. It’s more of a self-descriptor for a subset of behavior- people in whom their anxiety propels them, rather than shuts them down. The outward behaviors are extended, lifelong coping mechanisms that- to observers- seem like ordinary and desirable traits.
Imagine having noisy neighbors. To drown out their constant noise, you blast your favorite music as often as you can… and for some reason, everyone else then assumes you’re some kind of metalhead or a roadie for Slayer.
Throughout the day, a mind with anxiety doesn’t stop making noise:
- “You’re a failure.”
- “You’re a horrible friend and horrible person.”
- “Can’t even do that right, can you?”
- “You’re a hack. No one gives a crap about your writing.”
- You saw [successful pastry chef younger than me]? THEY’RE good at their job. You? The hell are you doing?”
The “high functioning” anxious mind then decides to try to drown out these thoughts:
- “Oh yeah? Well I just ran my fastest pace for the 5K yet!”
- “No I’m not! See, I’m helping this lady with her groceries!”
- “Well I got this other thing PERFECT!”
- “Well I’m gonna keep rewriting it till it’s AWESOME!”
- “Well I’m going to do extra stuff at work, and I’m going to join a professional group, and I’m going to…”
Repeat forever.
The Ring of Solomon- Putting Demons To Work
Let’s be real here. Doesn’t that sound like someone BORN for the kitchen?
A devoted, loyal, driven hard worker. They’re passionate, curious, made of 100% raw, uncut Hustle. New dishes? “Yes chef!” Need this crate of potatoes diced? “On it, Chef!”
Eager to do their best, eager to show off their skills, always laughing and joking. Eager to please.
They seem like they were born for this work. They love it. They’re emotionally invested in doing a good job.
Be honest… that’s the kind of person we ALL want working for us.
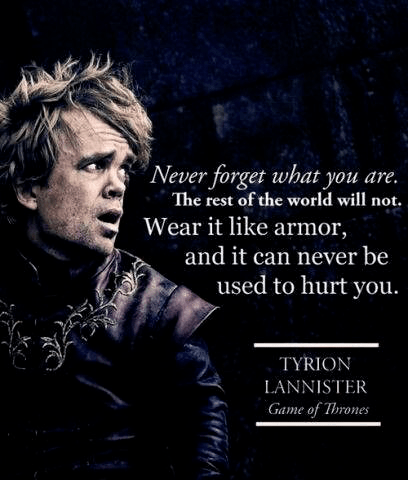
After a lifetime of quietly living with negative voices in their mind, these people have become VERY good at putting on a brave face and stomping out those voices with achievement and accolades. They are the Zen Masters of “fake it till you make it.” Without even being aware, they take Tyrion Lannister’s advice. They take their weaknesses and flaws and wear them like armor so nothing can hurt them.

|
|
Nothing except themselves, that is. The brain and body are not meant to have that kind of tireless, explosive energy forever… and these people burn energy at an incredible rate. Mentally, they are trying to marshal their thoughts to do what they want, and physically they exhaust themselves so the demons will fall asleep.
It doesn’t last, though.
Eventually, they run out of energy. They are physically and mentally burned out.
Maybe it takes a moment of intense external stress that causes a “snap,” or it’s a slow degradation, but the smiling and joking stops.
They lash out in anger and frustration, at others and themselves.
The work they love feels more like a burden, and they can’t help but express a lack of excitement for their tasks.
They make simple, silly mistakes… which frustrates them even more.
The demons wake up.
The stereo blows out, and they can hear the neighbors again, but now they’re screaming:
“You want to help others, but you can’t even help yourself.”
It’s a lie… but they are too tired to fight it anymore. The perfect worker becomes a perfect mess.

The Demon Hunter
The worst thing about this scenario is the fact that, well… it seems like so much good comes out of it. The person points to their demonstrated functionality and achievement and goes “Oh come on… yeah, I’m a little high strung, but a mental disorder?! I’m not a loonie, look at all I’ve done!”
Alternatively, if they ARE aware of it and they know something’s wrong, they might say, “Okay, I have some issues, but I don’t need help. I’m not THAT bad. Therapy and meds are for people who can’t function.” Worse, they might avoid getting help because they think it’s the SOURCE of their talent, like an addicted artist afraid to get clean. “Look at everything I’ve done… does this make me a fraud? What if I DO get better… people like me because I’m a hard worker! They keep me AROUND because of it.”
“I’m all about my work ethic… what am I WITHOUT it?”
I’d like to say that I have a perfect answer for this. A nice bright bow to tie up the entry with… but the fact is, I don’t. This is the point I find MYSELF at now.
The research I’ve done has made suggestions that, beyond therapy and possible medication, other answers include things like meditation, progressive muscle relaxation, mindfulness training, improving sleep habits and decreasing caffeine intake.
I’ll let you know how I manage to work those into kitchen life, and what happens next.
In the meantime, though, at least I know my demons have a face and a name- and that’s the first step to handling them.
Despite the macho-posturing and auteur myths we were all raised with, success does not require suffering.
There are more options than “lose the work you love” and “live in fear of yourself.”
Stay Classy,

Mental Health Resources (Thank you, Rachel!)
- Psychology Today: The main search bar for finding a therapist in the US, from a heavy-hitter in the world of psychology academia. You can search by speciality, insurance, or method- but this is just a directory. Make sure you follow up with individual practitioners to make sure they are accepting patients, take your insurance, etc.
- BetterHelp and TalkSpace: Generally affordable online-only counseling for a bit cheaper than an office visit.
Self-Care:
- If you have a smartphone, there are apps like Aloe Bud (helps you remember to look after yourself) and Plant Nanny (reminds you to drink water) that can help you build and maintain health habits. Other apps like Daylio include journaling, personal organization for the scatterbrained, and such.
Peer-to-peer Help:
- There are a number of groups on social media where you can simply talk with others who have issues and find community- Facebook and Reddit I know have them, I belong to a few myself. But I’m going to include a warning here, in Rachel’s own words because frankly they are excellent:
“It probably goes without saying, but just a note of caution when you dip your toes into the peer-to-peer arena: it’s easy to devote entirely too much of yourself to trying to help people who are not doing a great job of helping themselves. Put on your own life jacket before assisting others, and if you need to step back from the shared experiences in order to continue on your own path, then do so. Related to that, and something I’ve learned over time: everyone’s stories are equally valid and deserve space. There is no Mental Health Olympics, and I’m pretty sure you wouldn’t want to win any medal it’d offer. Even if imposter syndrome is telling you that there’s no way your story is as important as that one person’s story who’s spent months in their local psych hospital. Your story is allowed to take up the space it takes up. “
Media:
If you have some room in your day to listen to podcasts, Rachel recommends “The Hilarious World of Depression” and “Terrible, Thanks for Asking.” I can’t speak for these myself, since my own podcast choices are generally fictional/relaxing/escapist, but they are worth a listen at the very least.